We may earn money or products from the companies mentioned in this post.
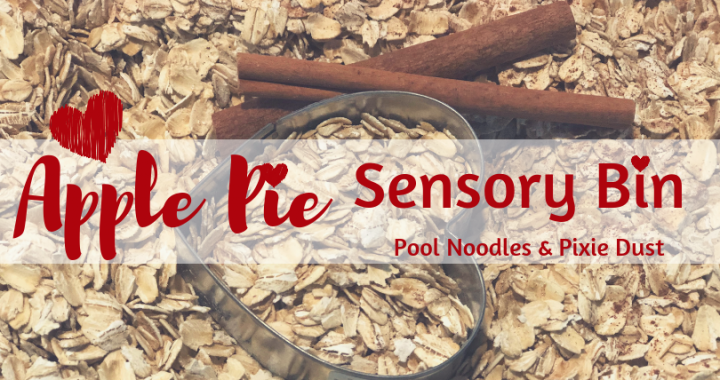
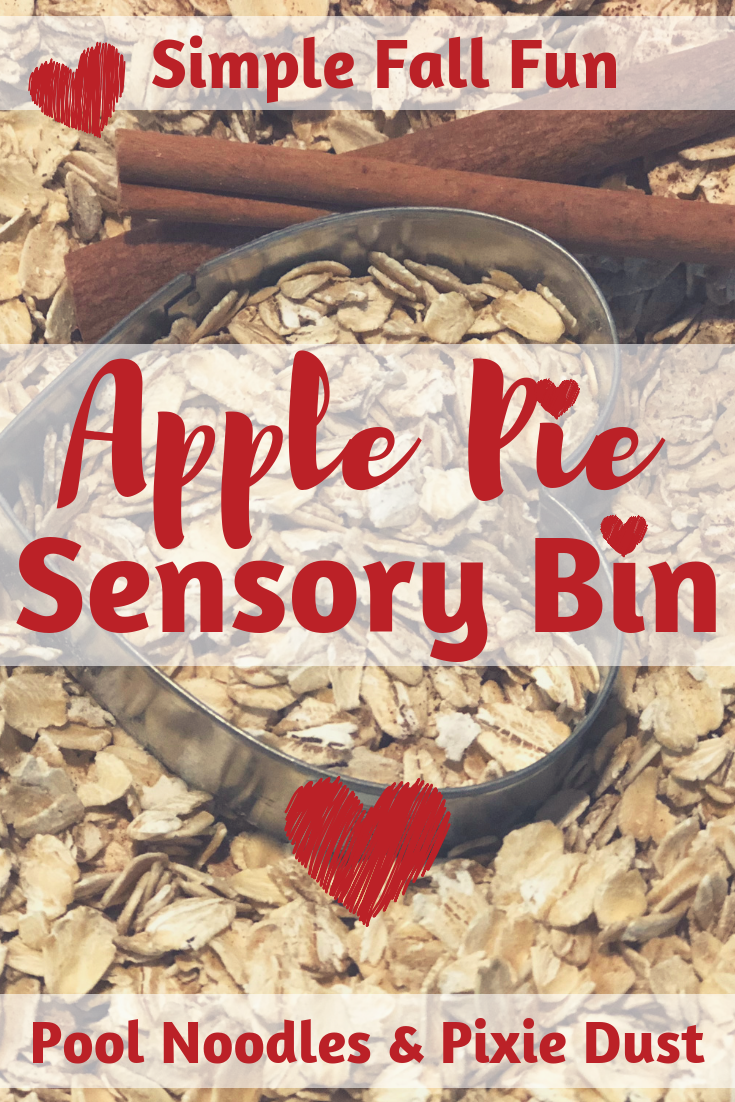
We are doing all the fall sensory play we can think up in our homeschool right now. And, loving it! Earlier this week we made taste-safe Pumpkin Pie Playdough and now we’re onto our Apple Pie Sensory Bin!
Yes, we love pie;)
And, with Thanksgiving only a few weeks away we have pie on the brain. So, why not turn that love into sensory play? This apple pie sensory bin is super quick to put together. And, it’s full of inexpensive materials.
Apple Pie Sensory Bin Fillings
To make this sensory bin you’ll need just 3 ingredients:
Oats – I used whole oats, probably about the equivalent of one large container.
Cinnamon – I used cinnamon sticks and I also gave my daughter a cinnamon shaker that was almost empty and let her add that to her bin to provide more of the cinnamon smell. If you don’t already have cinnamon sticks, keep this super frugal by skipping it and just adding a few shakes of ground cinnamon instead. It will smell amazing either way!
Apples – I added a few whole apples and some homemade apple chips.
The amount you use of each ingredient is completely up to you and the size of your bin.
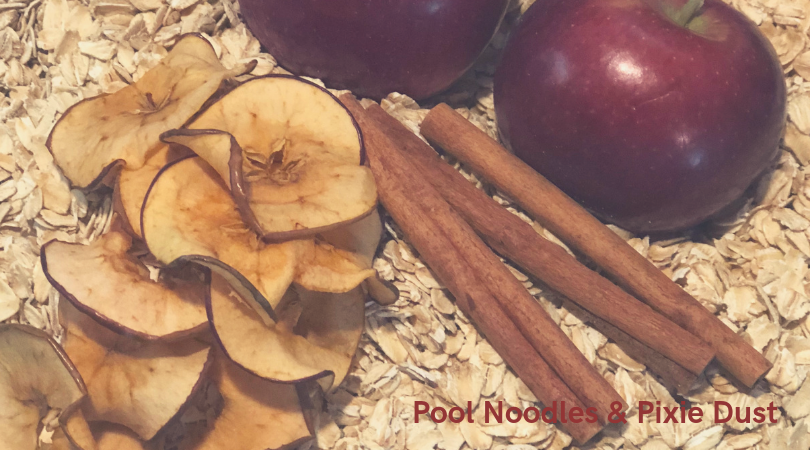
Homemade Apple Chips
You don’t need apple chips in your bin, but we had made some the day before so I decided to add them for another sensory element. And, they doubled as a sweet snack for my daughter while she played:)
This was my first attempt at making these at home and there may be better ways to make these, especially if you have a food dehydrator. But, I’m sharing my process for you anyway in case you’d like to try to make this super simple version.
Directions to make homemade apple chips:
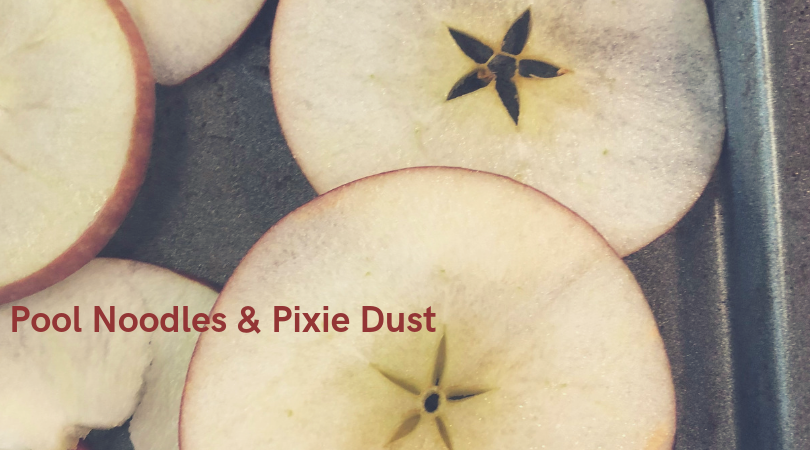
- Cut apples in thin slices
- Remove any seeds
- Lay slices in a single layer on a cookie sheet *Mine stuck to the sheet during cooking. Next time I make these I would spray the cookie sheet first. So, make sure to do this!
- Bake for 2-3 hours in a 250-degree oven
Every oven is different and cooking times will vary widely so check your chips a few times during the cooking process. Also, I did turn mine about an hour in. I didn’t time the cooking, but my guess is that it took somewhere between 2 and 3 hours. Repeat the process as many times as you need to make a few trays full. Because… they’re delicious!
We didn’t core our apples before slicing them into chips. And, I was so glad we skipped it because my kids were just in love with looking at the perfect stars we found inside the apples!
Assembling Your Bin
We added the oats, cinnamon, apples, and apple chips to the bin. Then I gave my daughter several items to use in the bin. Here is a list of some of the things we used:
- Spoons
- Tongs
- Spatula
- Basting Brush
- Small Funnels
- Cookie Cutters
- Cups
- Bowls
- Pie Plate
Sensory Bin Learning Ideas
You can absolutely just play in your sensory bin. That’s all we did! But, if you’re looking to add a little learning, here are a few ideas to add to your sensory bin.

- Try forming numbers, letters, or words with the cinnamon sticks.
- Hide alphabet letters or sight word flashcards in the bin for your child to find and match to another set near the bin.
- Place a set of number flashcards near the bin. Have your child choose a card and count that many like items from the bin. For example, if they choose the number five have them find and count five cinnamon sticks.
- Write out words that are relevant to your sensory bin on the back of index cards. Keep the cards near the bin and read them with your child to provide some relevant vocabulary work.
Here are a few words to write out:
- Apple
- Pie
- Bake
- Cinnamon
- Oats
- Sweet
https://www.pinterest.com/poolnoodlespixiedust/sensory-play/
Have fun playing with your apple pie sensory bin!
Heidi